


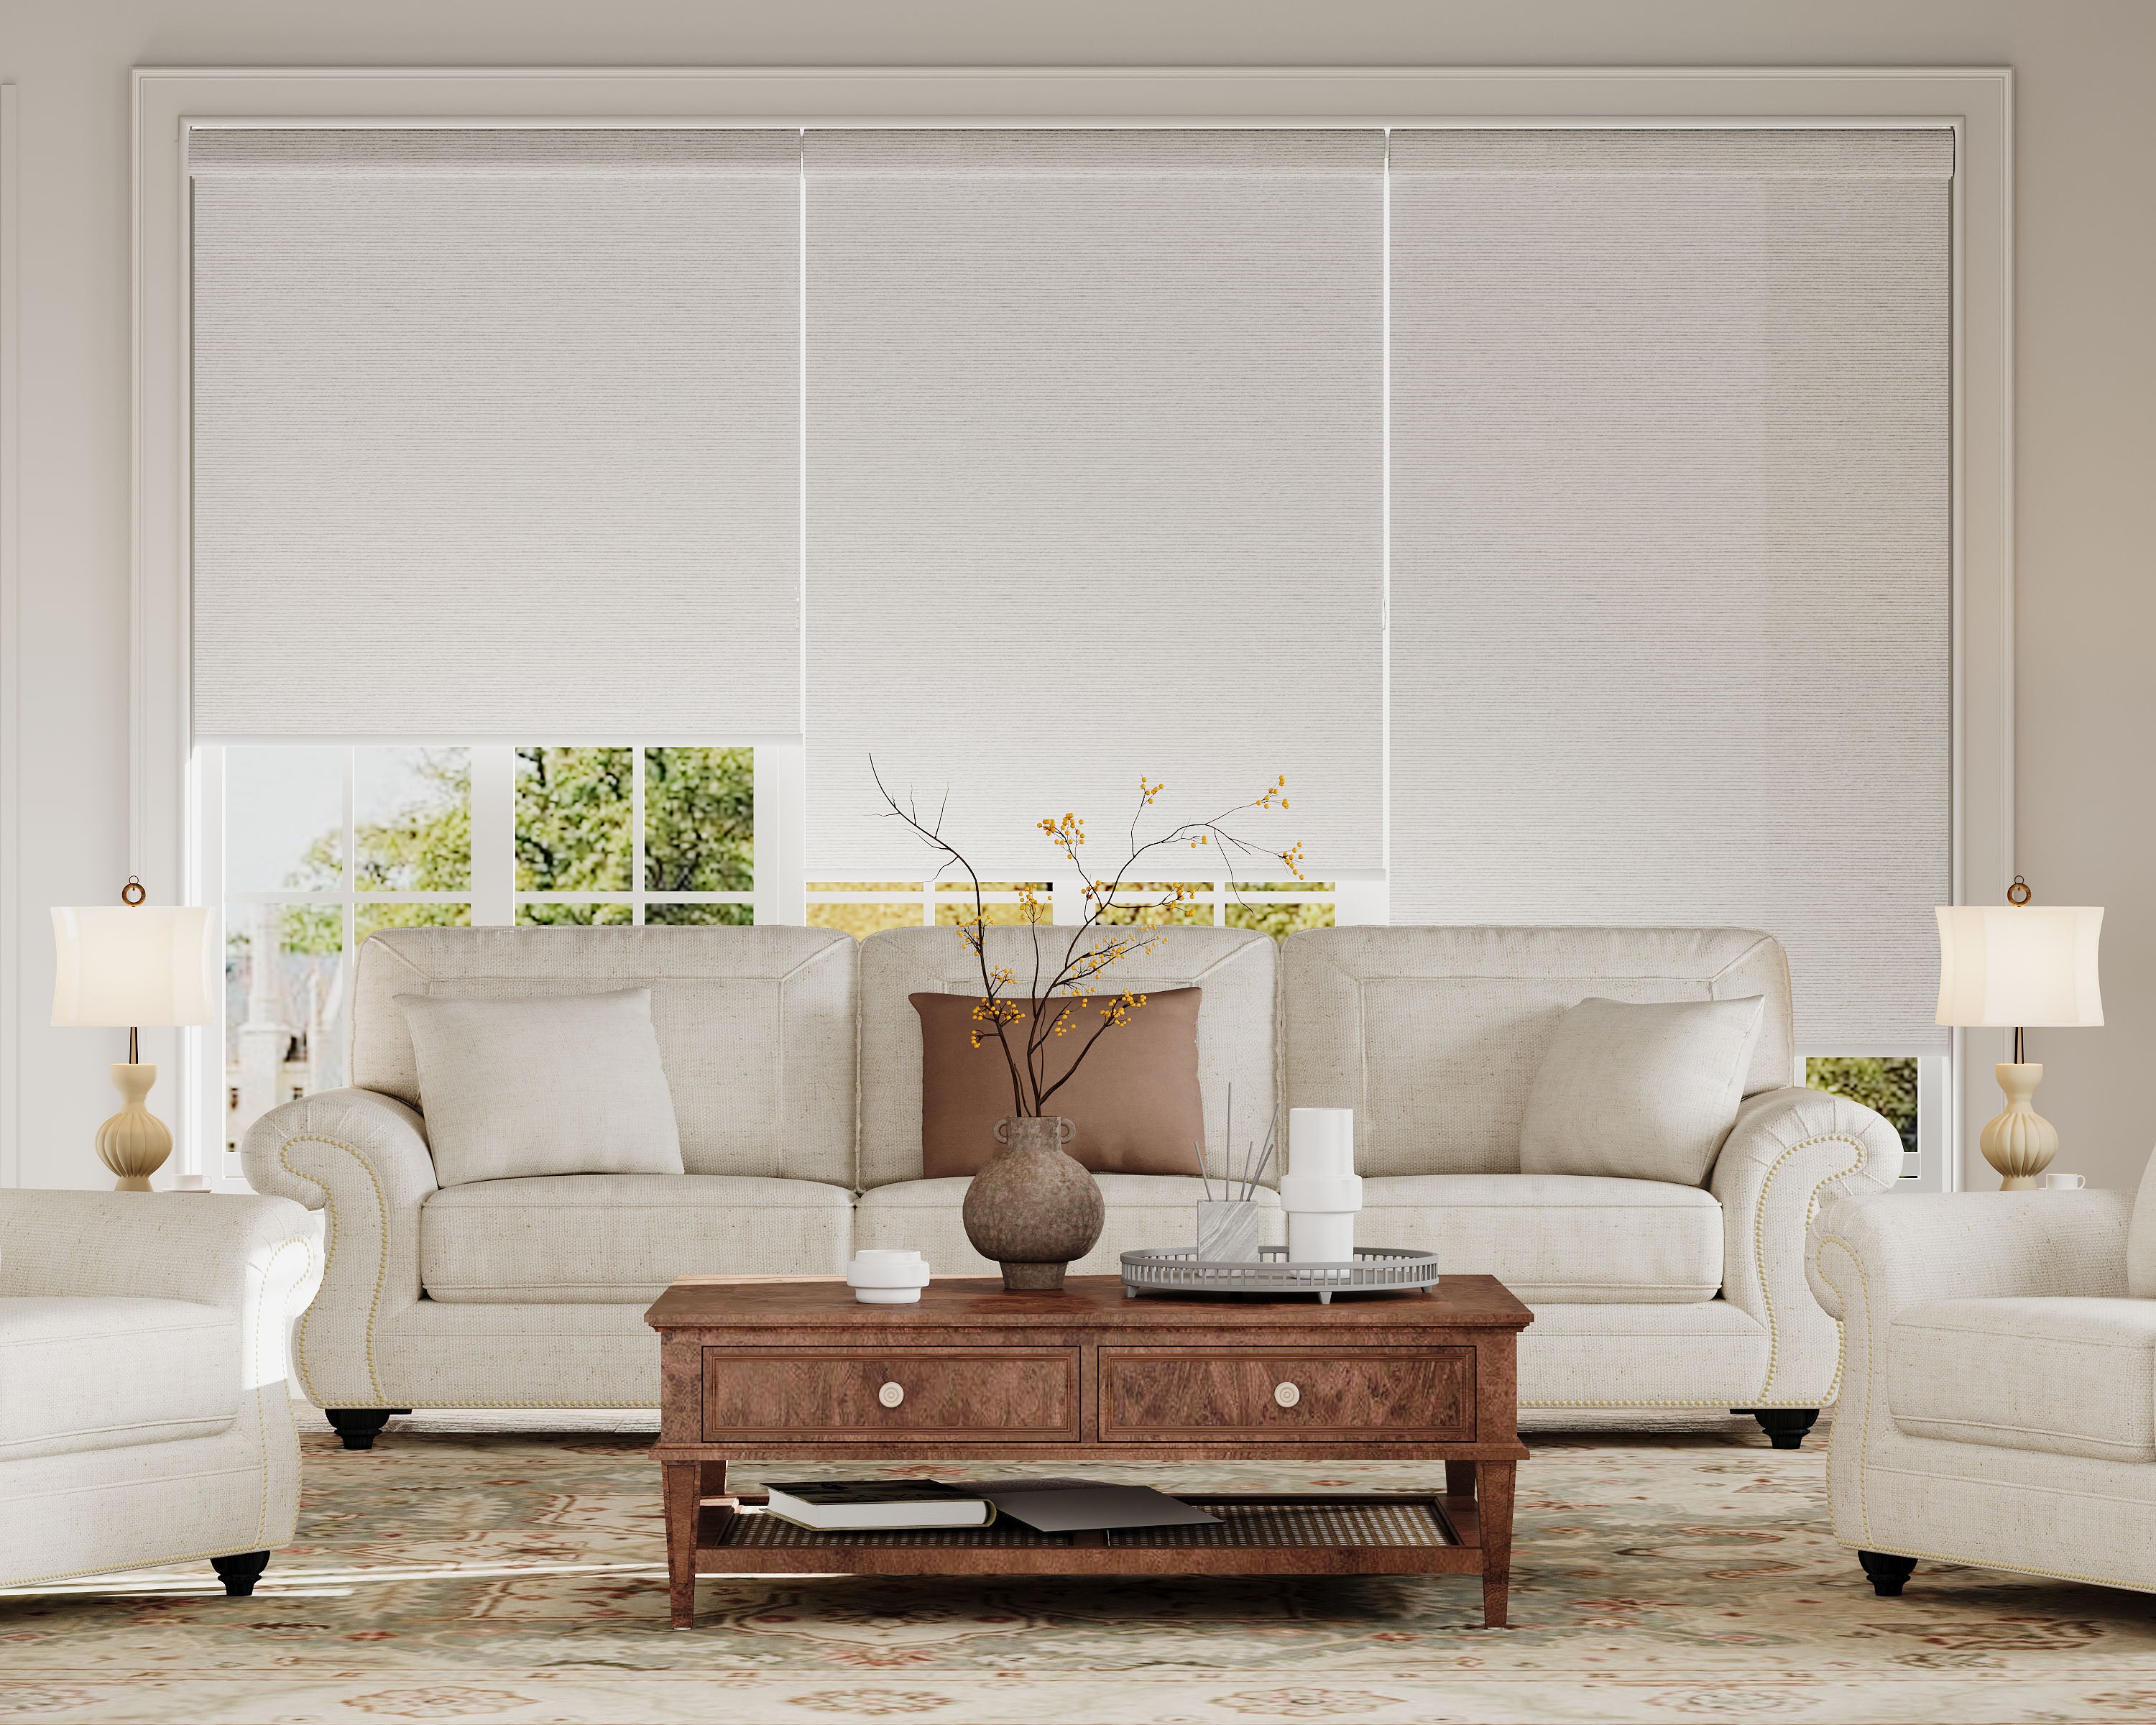


Yes, zebra shades are a superb choice for bay windows, offering a sleek, modern look and superb light control for complex angled spaces, but they require meticulous planning and often custom fabrication. The challenge isn't the shade's suitability, but the precision needed to adapt a linear product to a multi-faceted, projecting architectural feature. Success hinges on accurate measurement of non-square angles, choosing the right mounting strategy for your bay's profile, and coordinating multiple shade units for seamless operation. To begin visualizing the potential, explore the foundational styles in our collection of versatile zebra blinds and shades.
This definitive guide provides the master-level detail required to navigate this specialized project. Here is everything you will learn:
-
A detailed breakdown of bay window anatomy and the specific challenges each type (box, canted, circle) presents for roller shade installation.
-
Step-by-step professional measuring protocols for inside and outside mounts on angled frames, including how to handle depth, setbacks, and return walls.
-
A comprehensive comparison of installation approaches: individual shades per pane versus continuous corner-to-corner treatments, with clear analysis of aesthetics, function, and cost.
-
Critical hardware and operation considerations, including the use of specialty brackets, the necessity of motorization for hard-to-reach shades, and strategies for grouping controls.
-
Fabric and design selection strategies to ensure visual continuity, manage intense sunlight from multiple angles, and create a cohesive look from both inside and outside the home.
By the end, you will be equipped to collaborate effectively with designers and installers, transforming your bay window into a beautifully shaded focal point with zebra shades that fit and function flawlessly.
Understanding the Bay Window Challenge: Geometry is Everything
A bay window is not simply three windows in a row; it is a three-dimensional projection with angles, depths, and sightlines that standard flat-wall installations don't address. The primary obstacles are:
-
Angled Mullions & Non-Square Geometry: The side windows are rarely at perfect 90-degree angles to the center window. Installing separate shades means accounting for these obtuse or acute angles to avoid clashes when operating and to prevent unsightly light gaps at the corners.
-
Depth and Projection: The window's projection from the wall creates a deep sill and side walls (returns). You must decide whether to mount shades within this recess (inside mount) or on the face of the returns and header (outside mount), each with significant visual and functional implications.
-
Multiple Operating Units: A typical bay requires three or more separate shades. Coordinating their operation—especially if they are close together at the corners—requires careful hardware selection and spacing.
-
Intensified Light and Heat Exposure: With glass facing multiple directions, bay windows capture more sunlight, increasing glare and solar heat gain. This makes the adjustable light filtration of zebra shades particularly valuable, but also demands high-performance fabrics.
Measurement and Planning: The Foundation of Success
Incorrect measurement is the single greatest point of failure for bay window shades. Professional measurement is highly recommended, but understanding the process is crucial.
Key Measurement Principles:
-
Measure Each Pane Individually: Never assume symmetry. Measure the width and height at the top, middle, and bottom of each individual window opening (for inside mount) or the area you want to cover (for outside mount).
-
Note the Angles: Use an angle finder to determine the exact angle between the center and side windows (common angles are 30, 45, or 90 degrees for a box bay). This is critical for ordering hardware and ensuring clearance.
-
Account for Obstructions: Precisely measure the clearance for handles, window cranks, and locks. Note the depth of the window sill and the projection of the bay from the main wall.
Inside Mount vs. Outside Mount: A Strategic Decision
-
Inside Mount (Within the Recess):
-
Pros: Cleanest, most built-in look; allows the beautiful window trim and architecture to remain visible.
-
Cons: Requires sufficient depth in the window recess (typically >2.5 inches) for the bracket and rolled shade. Angled side walls may make a flush fit impossible, leading to light gaps at the side edges. Does not mitigate light gaps between adjacent shades in the corners.
-
-
Outside Mount (On the Face Frame or Wall):
-
Pros: Eliminates light leak from the sides of each shade. Can make an uneven bay look more symmetrical by creating a uniform rectangular footprint across the entire projection. Hides imperfect window frames.
-
Cons: Has a more prominent, installed appearance. Requires precise alignment across the bay to look intentional.
-
Bay Window Mounting Strategy Comparison
| Mount Type | Best For | Key Challenge | Solution |
|---|---|---|---|
| Inside Mount | Deep window recesses with square angles; highlighting original trim. | Light gaps at angled sides; insufficient depth. | Use side channels (light gaps) or accept a "floating" look. Ensure depth clearance is confirmed. |
| Outside Mount | Shallow recesses, uneven angles, or a desire for maximum light blockage. | Creating a perfectly aligned, level header line across multiple planes. | Use a continuous headrail or meticulously level individual brackets to a common line. |
| Hybrid Approach | Maximizing view and light when shades are up. | Complex installation. | Mount shades on the ceiling of the bay projection, allowing them to drop clear of the windows entirely. |
Installation Approaches: Individual Shades vs. Continuous Treatment
You must choose how the shades relate to each other physically—as separate entities or as a connected system.
1. Individual Shades per Window Pane
The most common and often most cost-effective method. Each window (center, left, right) gets its own independently operating zebra shade.
-
Pros: Allows for zoned control (e.g., lowering only the sunny side). Uses standard shade hardware. Easier to service or replace individually.
-
Cons: Visible gaps between shades at the corners, even when down. Requires careful spacing (typically 1.5"-2" between brackets) to ensure shades don't collide when operating. The "broken" visual line can appear cluttered.
2. Continuous Headrail or Linked Corners
A more advanced, custom solution where shades are mounted on a single, continuous headrail that travels around the bay's angles, or where separate headrails are linked with custom corner pieces.
-
Pros: Creates a stunning, unified, modern appearance with no gaps between shades. Operates as one cohesive unit or with separately controlled sections in a seamless track.
-
Cons: Significantly higher cost due to custom fabrication. Requires expert, precise installation. If one section fails, it can impact the entire system.
Operation and Hardware: Ensuring Daily Functionality
The usability of shades in a bay window, often over furniture, is paramount.
-
Motorization is Virtually Essential: Operating multiple individual shades by hand, especially if they are above seating or in a deep bay, is highly inconvenient. Motorization allows for control via a single remote or app. You can group all shades to move together or program them to respond to sun angles (e.g., lower west-facing shades in the afternoon). This leverages the kind of smart home automation that makes complex shading effortless.
-
Cordless for Safety and Cleanliness: In a bay window area that may be a reading nook or play space, eliminating all cords is critical for safety and aesthetics.
-
Specialty Brackets: For inside mounts on angled returns, manufacturers offer angled brackets that allow the shade to hang plumb even when mounted on a slanted surface. For outside mounts, projection brackets can bring the shade away from the window to ensure clearance.
Fabric and Design Selection for Cohesion
In a multi-shade installation, design choices are amplified.
-
Fabric Consistency: Ensure all fabrics are from the exact same dye lot to prevent subtle color variations between adjacent shades, which would be glaringly obvious.
-
Opacity for Light Management: Given the increased sun exposure, consider room-darkening fabrics for sleeping areas or media rooms. The adjustable nature of zebra shades means you can still achieve soft light when desired. The functional difference in light control is substantial, as explored in our guide to room darkening versus blackout performance.
-
Color for Visual Effect: Lighter colors will help the shades recede visually, making the bay feel more open. A continuous outside mount in a dark color can create a bold, framed graphic effect. Sample fabrics are non-negotiable to see how they look in the bay's unique, multi-directional light.
-
Prioritize Durable Materials: Choose high-quality, high-GSM polyester fabrics known for longevity, as the shades will be frequently adjusted. This aligns with the criteria for selecting the most durable zebra shade fabrics.
Conclusion: Transforming Complexity into a Design Asset
A bay window with well-executed zebra shades becomes a dynamic architectural feature, not just a source of light. The project's complexity is real, but it is manageable through systematic planning: precise measurement, a strategic choice between individual or continuous mounting, investment in motorized operation, and selection of cohesive, high-performance fabrics.
While the DIY path is fraught with risk for bay windows, partnering with a skilled designer and installer who understands these nuances will yield a spectacular result. The investment delivers not only beautiful light control but also enhances energy efficiency and the daily enjoyment of one of your home's most charming spaces.
For bays that function as home office nooks or reading areas, this precise environmental control is as valuable as it is in a dedicated home office setup.
Key Highlights
-
Zebra shades are ideal for bay windows but require solutions for angles, multiple units, and light gaps.
-
Professional measurement is critical to account for angles, depth, and pane-to-pane variations.
-
Choose between individual shades (for zoned control) and continuous systems (for a seamless, gap-free look).
-
Motorization and cordless operation are highly recommended for safety and convenience with hard-to-reach shades.
-
Fabric consistency and durability are paramount; use samples and select high-GSM polyester from a single dye lot.
Explore Custom Zebra Shades


Frequently Asked Questions (FAQ)
What is the biggest mistake people make when ordering zebra shades for a bay window?
The biggest mistake is assuming the bay is square and symmetrical. Homeowners often measure just one pane and order three of the same size, or fail to account for the angle between windows, resulting in shades that collide or leave large, triangular light gaps in the corners. Each pane must be measured independently, and angles must be documented.
Can zebra shades be installed on a curved or bow window?
True zebra shades, with their rigid roller mechanism, cannot bend around a gentle curve. They are designed for flat or angled installations. For a curved bow window, the solution is to install individual shades on each flat segment of the window. When viewed from a distance, the effect can approximate the curve, but there will be slight breaks between each shade unit at the mullions.
How much space do I need to leave between shades in the corners?
For individually mounted shades to operate without touching, you typically need a minimum of 1.5 to 2 inches of space between the end of one shade's headrail and the beginning of the next. This gap is necessary for the brackets and to allow a hand (or the shade itself) to access the operating mechanism. This gap will be visible when shades are down. For a gapless look, you must invest in a continuous headrail system.
Is it possible to have a top-down/bottom-up zebra shade on a bay window?
Yes, but it is a premium custom application. The top-down bottom-up functionality can be especially useful in a bay window to allow light in from the top while maintaining lower privacy, or to clear the lower portion of a window that has a deep sill or window seat. However, the added mechanism requires more headrail space and a deeper window recess for inside mounts, and it significantly increases the cost per shade unit.
