


98% Buyer satisfaction Rating
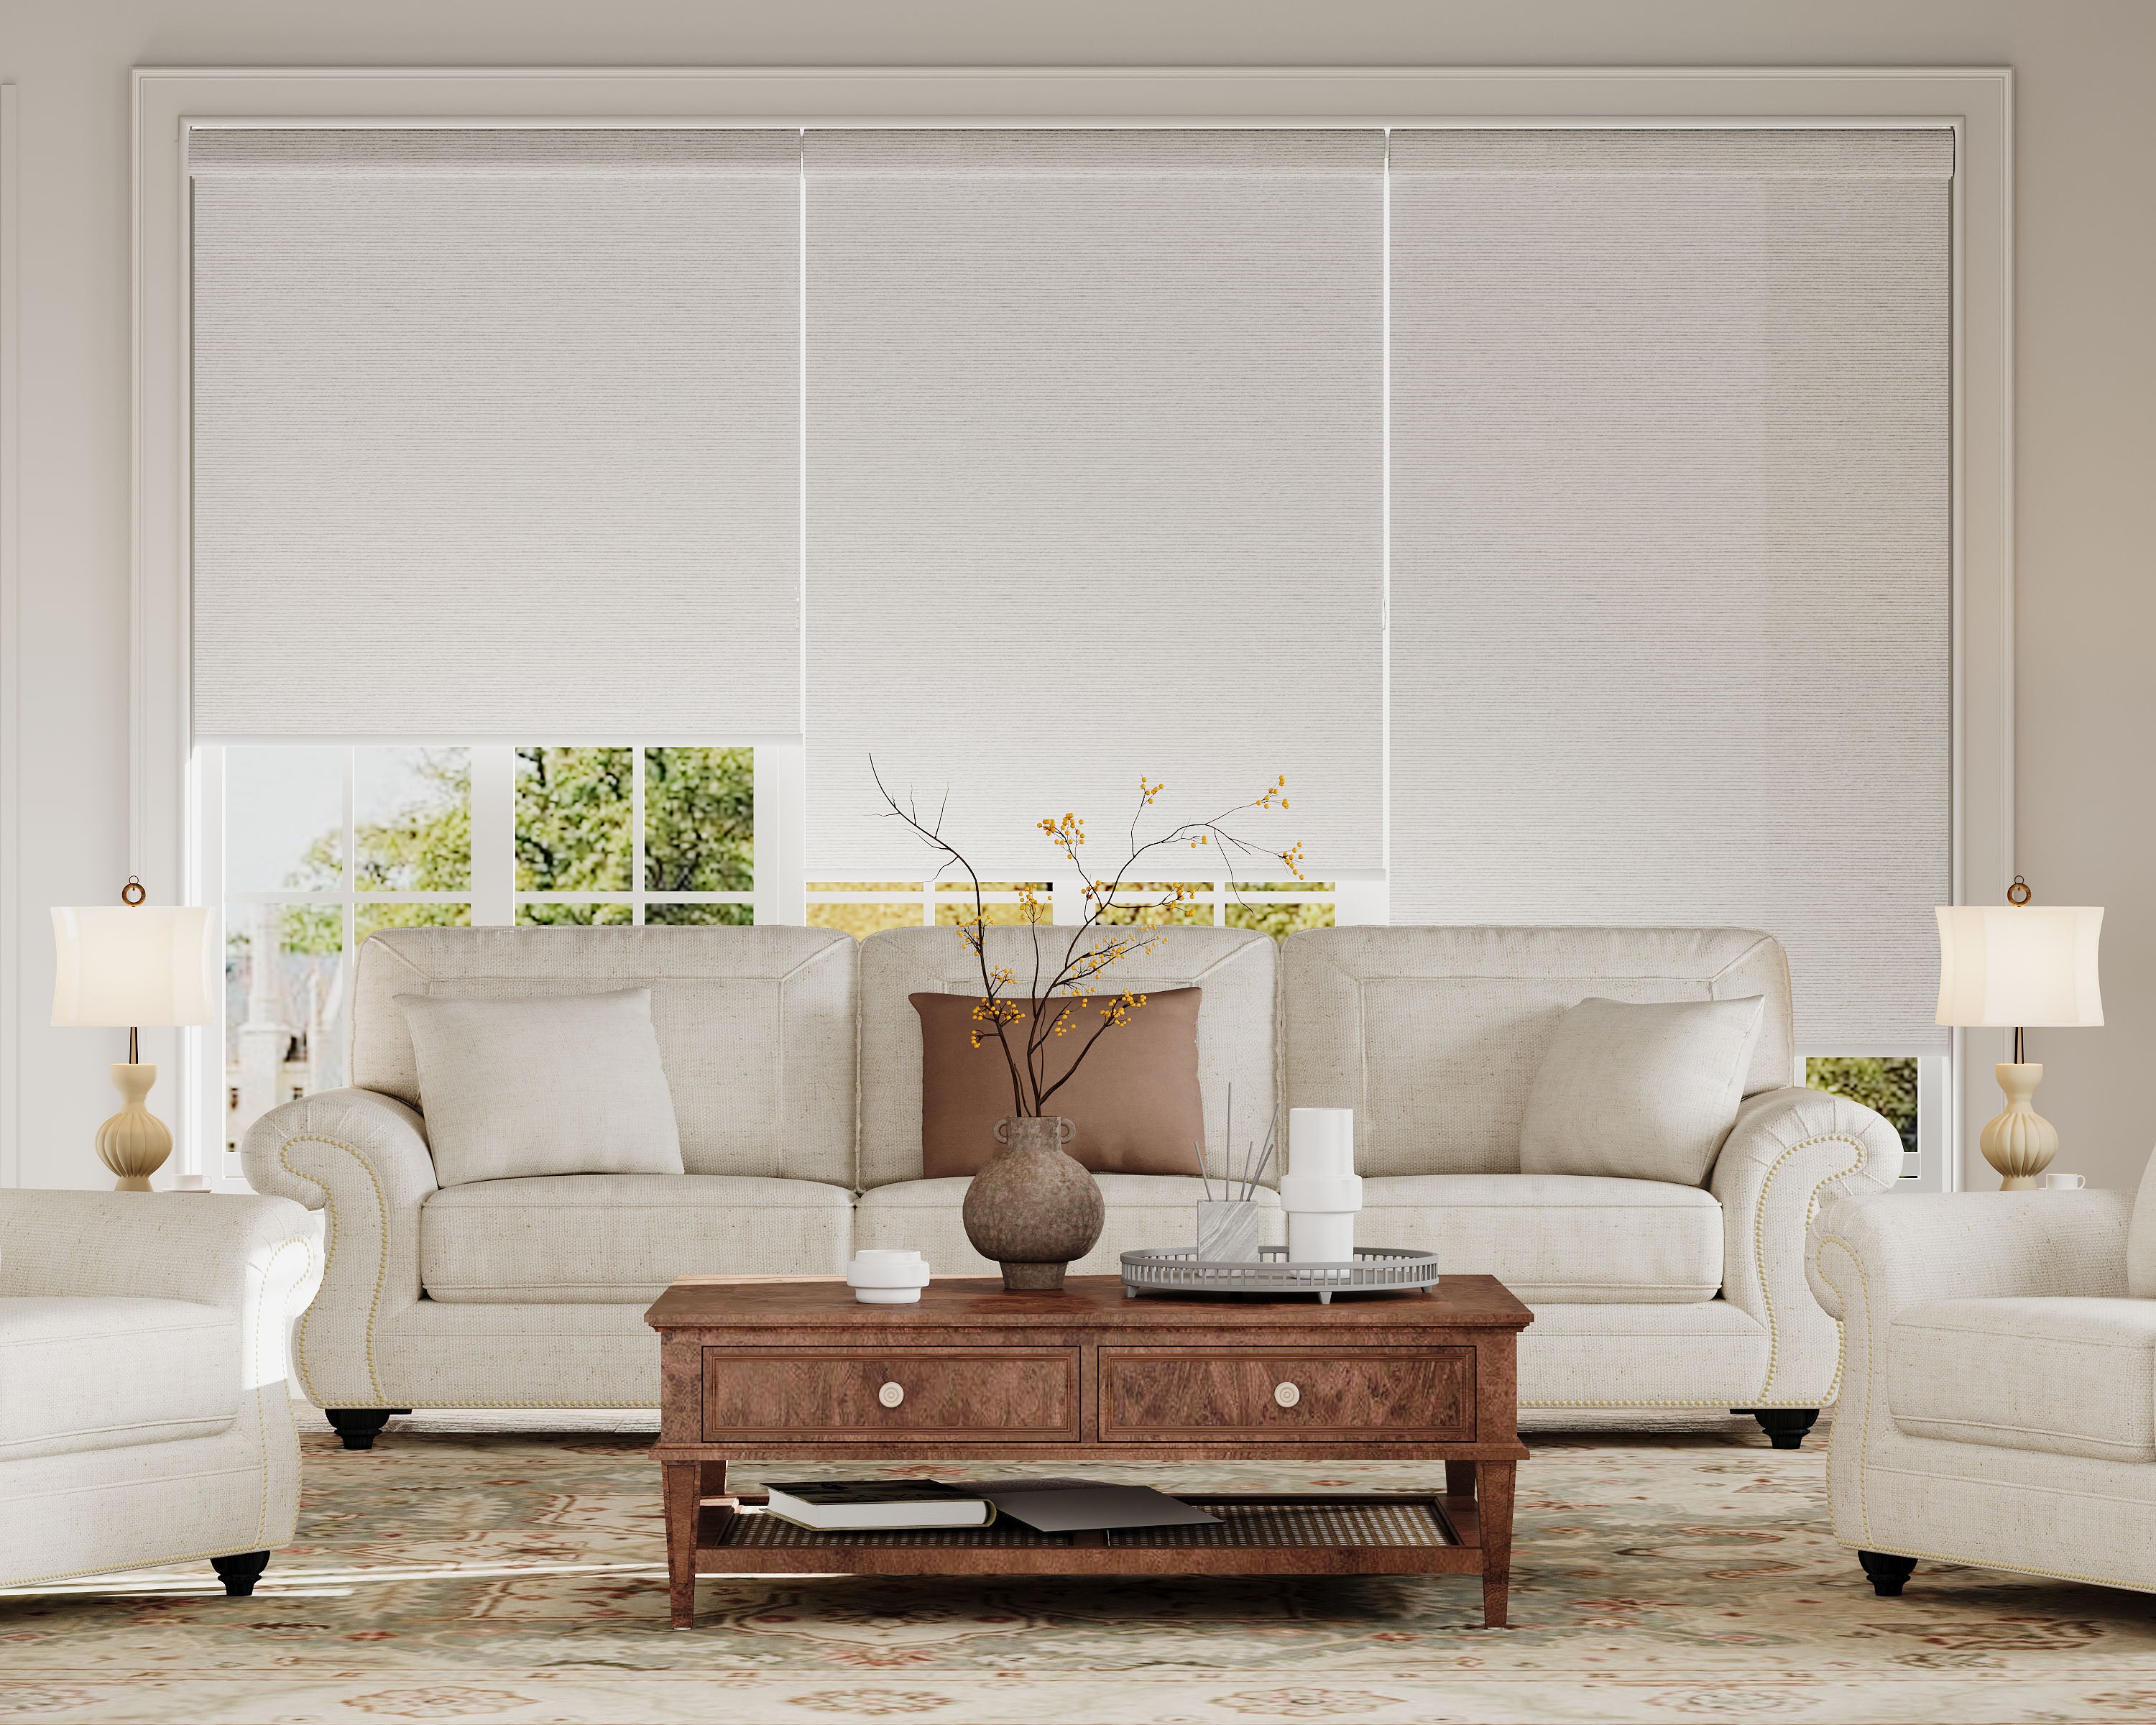
Light Filtering Roller Shades – 60-70% Light Blocking, 4 Fabric Series (AYM, Shantung, Uluru, Arizona), Linen & Textured Weaves, GREENGUARD Certified, Cordless & Motorized, Child-Safe for Living Room & Kitchen
$50.00
$70.00
Unit price
/
Unavailable


29% off

Video


98% Buyer satisfaction Rating
Light Filtering Roller Shades – 60-70% Light Blocking, 4 Fabric Series (AYM, Shantung, Uluru, Arizona), Linen & Textured Weaves, GREENGUARD Certified, Cordless & Motorized, Child-Safe for Living Room & Kitchen
$50.00
$70.00
Unit price
/
Unavailable
 Your custom-made shades are estimated to ship in 4 ~ 5 business days
Buy More, Save More
| Spend | Save |
|---|---|
| $450+ | $35 off |
| $750+ | $100 off |
| $1,100+ | $130 off |
| $1,500+ | $210 off |
Extra savings are automatically applied at checkout
Free shipping with delivery in 3–7 business days
Buy directly from the manufacturer
Dedicated customer support based in North America
Replacement guarantee for quality or delivery issues within 30 days
Any question? Feel free to contact us: (877) 930-2299 or
support@senseblinds.com
How to Measure
Let's make sure an inside mount will work for your window!
Using a metal tape measure, first check if you have sufficient depth:
Measure inside the window opening from the back of the window to the front of the opening where the shade would mount. To mount the brackets, the depth at the top of the window must be at least 2" for shades without a cassette valance(Exposed Roll) and 2" for shades with a cassette valance. To have a flush mount (meaning the shade is fully recessed in the window opening) the depth must be between 2 1/8" and 4" (depending on roll diameter) for shades without a cassette valance and 3 3/4" for shades with a cassette valance. If your depth is not sufficient for mounting the brackets, please see our outside mount instructions or consider a different product.
How to Measure:
Let's start with the Width:
- Measure inside of the window opening/frame from left to right at the top of the opening to the nearest 1/8". If rounding is necessary, round down to the nearest 1/8". That is your ordering width.
Now, let's do the Height:
- Measure the inside of the window opening/frame from the top of the opening to the bottom of the opening/sill to the nearest 1/8" in three places: on the left-hand side, the middle, and on the right-hand side. Write down all 3 measurements and circle the tallest. That is your ordering height.
Note: Always provide us with the actual measurement of the window opening. We will make the necessary deduction of approximately 1/2" to the width of the top of the shade to accommodate the installation brackets.
The fabric portion of the shade will be approximately 1" – 1 1/2" narrower than the ordered width (up to 1/2" gap on each side between the window opening and the edge of the fabric). When maximum light blocking is needed, consider an outside mount or an alternate product.
No deductions will be made to the ordered height.
Video: How to Measure for Inside Mount
Before you start measuring, decide where above your window opening you want to mount your shade. You will need at least 2" of flat vertical space above the window to mount the brackets for shades without a cassette valance, or at least 2 1/8" for shades with a cassette valance. Follow the directions below for where you'd like to install your shade.
If you do not have sufficient vertical space for mounting the brackets, please see our inside mount instructions or consider a different product.
Your ordered width will be the "tip to tip" measurement, which is the widest part of the top of the shade including the brackets and cassette valance (if applicable). The fabric portion of the shade will be approximately 1/2" – 1" narrower than the ordered width. If you wish to have the fabric cover a specific width, we recommend ordering slightly wider — just ensure that you have enough horizontal space to mount the shade.
Above the Window (No Trim) ›
Width:
Looking at your window and surrounding wall, decide what area you would like to cover. We recommend the shade extends about 2-4" on each side of the window opening for the best light control and appearance.
Using a metal tape measure, measure from left to right including your desired extra space on each side of the window— that is your ordering width.
Height:
Consider how far above the window you would like to install your shade but at least starting with the minimum vertical space referenced above. Since the shade spools onto the roll, it does not need to be installed high above the window to have the shade fabric fully clear the window.
Measure from the top of where you will mount the shade on the wall down to where you want the bottom of the shade to be, using the same extra space below your window opening as you used above; if you have a protruding windowsill, measure down to the top of the sill. That is your ordering height.
Above the Trim ›
Width:
Looking at your window and surrounding wall, decide what area you would like to cover. We recommend the shade extends about 2-3" on either side of the window opening for the best light control and appearance.
Using a metal tape measure, measure from left to right including any desired extra space on each side of the window— that is your ordering width.
Height:
Consider how far above the window you would like to install your shade but at least starting with the minimum vertical space referenced above. Since the shade spools onto the roll, it does not need to be installed high above the window to have the shade fabric fully clear the window.
Measure from the top of where you will mount the shade on the wall down to where you want the bottom of the shade to be, using the same extra space below your window opening as you used above, or to the bottom edge of the trim if you prefer; if you have a protruding windowsill, measure down to the top of the sill. That is your ordering height.
Note: The shade fabric may rub against the trim when operating. If your trim is more than 1/2" thick, consider adding shims (not included) under the brackets for additional clearance. If your trim is 3/4" or thicker, We recommend using the extended bracket with slot.
On The Trim ›
Width:
We don't normally recommend mounting roller shades directly on the trim unless your window configuration doesn't allow for other placements. Your ordered width will be the bracket to bracket measurement which cannot exceed the width of your trim. However, the fabric portion of roller shades is always narrower than the ordered width, and will not extend to the edges of the trim.
Confirm that the height of your trim is at least the minimum height required for installing the mounting brackets. At the top of your window, use a steel measuring tape and measure from outer edge to outer edge of the trim. That is your ordering width.
Note that the fabric portion of the shade will be narrower than your ordered width.
Height:
Measure from the top of your trim to the bottom of your trim or to the top of the windowsill if you have a protruding sill. That is your ordering height.
Door Mount ›
Width:
Using a metal tape measure, measure left to right from the outside edge of the trim piece that goes around the glass to the other outside edge. That is your ordering width. However, if you have space, it is best to order the shade about 2-4" wider for better light control.
Height:
Consider how far above the window trim piece you would like to install your shade but at least starting with the minimum vertical space referenced above. Measure down to where you want the bottom of the shade to be, using the same extra space below the window trim piece as you used above. That is your ordering height.
Video: How to Measure for Outside Mount
How to Install
Let’s get ready to install your inside mount shades
Before you begin, make sure you have everything you need for a smooth and secure installation.
What’s included in the box:
- Shades
- Installation brackets
- Mounting screws
- Safety tension device
- Remote control (if applicable)
- Charging cable (if applicable)
What you’ll need:
- Rechargeable drill (with 1/4" drill bit)
- Phillips screwdriver
- Pencil
- Tape measure
- Ladder (if needed)
Important: Do not remove the protective paper wrapping from the fabric until the shade is fully installed. Removing it too early may cause the fabric to shift or affect alignment.
Once everything is prepared, follow the step-by-step installation instructions in the guides below.
Download Guides
Video: Inside Mount Installation
Let’s get ready to install your outside mount shades
Before you begin, make sure you have everything you need for a smooth and secure installation.
What’s included in the box:
- Shades
- Installation brackets
- Mounting screws
- Safety tension device
- Remote control (if applicable)
- Charging cable (if applicable)
What you’ll need:
- Rechargeable drill (with 1/4" drill bit)
- Phillips screwdriver
- Pencil
- Tape measure
- Ladder (if needed)
Important: Do not remove the protective paper wrapping from the fabric until the shade is fully installed. Removing it too early may cause the fabric to shift or affect alignment.
Once everything is prepared, follow the step-by-step installation instructions in the guides below.
Download Guides
Video: Outside Mount Installation
Recommendations and Limitations
Important Notes & Motorization Details
Please review the following information carefully before purchase.
Important Notes
- There may be a +/- 1/8 inch measurement discrepancy. When measuring shades, do not account for factory deductions.
- For outside-mounted shades with exposed rollers, mounting brackets will remain visible.
- To ensure consistent fabric alignment, please indicate if multiple shades will be installed in the same room.
- Fabric color may vary slightly between dye lots. To ensure consistency, order all shades for the same room at the same time.
Additional Information
- Safety devices must be installed to prevent the formation of hanging loops.
- Continuous cord loops are supplied in white.
- Fabric-insert cassette systems use matching fabric, with the bottom rail coordinated accordingly.
- Aluminum cassettes are available in multiple finishes with matching bottom rails.
Motorization Details
- Motorized remotes are not included. At least one remote is required per order.
- Each remote can control one curtain per channel.
- A 15-channel remote can control up to 15 individual curtains.
- Motorized systems support smart control via compatible smart hubs.
Specifications
Beaded Chain Lift Option ›
| Aluminum Valance | Fabric Insert Cassette | Without Cassette | |
|---|---|---|---|
| Outside Mount Flat Space Required | 2 1/8" | 2 1/8" | 2" |
| Min Depth for Inside Mount | 2" | 2" | 2" |
| Depth Required for Flush Mount | 3 3/4" | 2 1/8" | / |
| Minimum Height | 12" | 12" | 12" |
| Maximum Height | 120" | 120" | 120" |
| Minimum Width | 14" | 14" | 14" |
| Maximum Width | 103" | 103" | 103" |
| Light Gap / Chain Side | 1/2" | 1/2" | 3/4" |
| Light Gap / Opposite Side | 1/4" | 1/4" | 1/2" |
Cordless Lift Option ›
| Aluminum Valance | Fabric Insert Cassette | ||
|---|---|---|---|
| Outside Mount Flat Space Required | 2 1/8" | 2 1/8" | |
| Min Depth for Inside Mount | 2" | 2" | |
| Depth Required for Flush Mount | 3 3/4" | 2 1/8" | |
| Minimum Height | 12" | 12" | |
| Maximum Height | 105" | 105" | |
| Minimum Width | 20" | 20" | |
| Maximum Width | 78" | 78" |
Motorized Lift Option ›
| Aluminum Valance | Fabric Insert Cassette | Without Cassette | |
|---|---|---|---|
| Outside Mount Flat Space Required | 2 1/8" | 2 1/8" | 2" |
| Min Depth for Inside Mount | 2" | 2" | 2" |
| Depth Required for Flush Mount | 3 3/4" | 2 1/8" | / |
| Minimum Height | 18" | 18" | 18" |
| Maximum Height | 120" | 120" | 120" |
| Minimum Width | 20" | 20" | 20" |
| Maximum Width | 96" | 96" | 96" |
Smart Wand Lift Option ›
| Must with Cassette | |||
|---|---|---|---|
| Outside Mount Flat Space Required | 2 1/8" | ||
| Min Depth for Inside Mount | 2" | ||
| Depth Required for Flush Mount | 3 3/4" | ||
| Minimum Height | 18" | ||
| Maximum Height | 120" | ||
| Minimum Width | 24" | ||
| Maximum Width | 96" |
Shipping & Return
- Enjoy free shipping on product orders within the continental United States & Canada.
- The sample shipping fee of $3.99 is fully refundable when you place a blinds order. To receive the refund, place a window covering order within 30 days of your sample order and include your sample order ID in the "Special Instructions" section during checkout.
- Each is custom-made to your exact specifications and generally ships within 3 to 5 business days after your order is placed.
- We hold all orders for 24 hours before processing to allow time for any adjustments to measurements or color choices.
- Please note that shipping may take an additional 3 to 7 business days.
- For customized shades, and blinds, we usually will not accept returns. Click to see more return policy
5-Year Warranty
Built for Long-Term Reliability
At Sense Blinds, we stand behind the quality of our products with a 5-Year Warranty. If there are any issues with parts or components during this period, we’ll send you a brand-new replacement. For more information about our warranty,click here.
Certified Quality & Safety

Responsibly Made
Crafted with materials that meet strict environmental and safety standards.

Non-Toxic Materials
Tested to ensure materials are safe for everyday use.

Chemical Safety Compliance
Complies with REACH regulations to meet strict standards on restricted substances.

Quality You Can Trust
Independently tested to ensure consistent quality and performance.

Responsibly Sourced Materials
Compliant with RoHS standards for safer, more sustainable materials.

UV Protection

Does Not Fade

Hassle Free Assembly

Smooth & Quiet Lift

Easy Maintenance

5-Year Warranty
Choose How You Want to Operate
Cordless Lift
Clean, minimal operation with no visible cords for a safer and more modern look.
Continuous Cord Loop
Smooth chain-operated control, ideal for larger shades and precise positioning.
Motorized with Remote
Adjust your shades with one touch for added convenience and a cleaner cordless finish.
Wand Lift Option
A simple manual control option that offers a clean appearance and easy everyday use, without the need for cords, chains, or remote charging.

Shantung Series
The Shantung features a refined linen-inspired look with a fine plain-weave structure. Its subtle crosshatch effect and soft heathered appearance create a clean, textured finish that feels both natural and understated.
- 100% Polyester
- 70% light blocking, allowing natural light to filter through while maintaining privacy

Uluru Series
The Uluru features a multilayer woven construction that creates a refined surface with subtle depth and texture. Except for white, the color options display naturally irregular woven patterns, adding visual variation and a sense of dimensionality.
- 100% Polyester
- 70% light blocking, allowing natural light to filter through while maintaining privacy

Arizona Series
This Arizona fabric features a two-tone woven composition, combining white yarn with a secondary color. The structure follows a repeating three-layer pattern, creating subtle visual rhythm and depth across the surface. The horizontal woven texture adds natural variation while maintaining a clean, balanced appearance.
- 100% Polyester
- 60% light blocking, allowing gentle light transmission with a slight see-through effect

AYM Series
The AYM fabric features a timeless plain weave, creating a warm and cozy ambiance. Inspired by traditional craftsmanship, it brings a sense of authenticity and understated simplicity to any space.
- 100% Polyester
- 70% light blocking, allowing natural light to filter through while maintaining privacy
Features

Aluminum Valance
Sleek aluminum headrail with a clean, modern finish. Available in five color options, with the bottom rail color matched to your selected valance for a cohesive and well-finished look.

Fabric Insert Cassette
A cassette valance conceals the roller tube at the top of the window, while a fabric insert covers the face of the cassette for a clean and finished appearance.

Bottom Rail
A precision-weighted bottom rail, color-matched to the selected aluminum valance, ensures smooth operation and a straight, balanced hang. In certain cases, a fabric-wrapped bottom rail may be used.

Chain Safety Fixing Device
Designed to secure the bead chain to the wall for safer everyday use in homes with children or pets.
Choose the Right Lift Option for Your Needs
| Lift Option | Best For | Key Benefits |
|---|---|---|
Chain Lift |
Large or heavy shades |
Most stable and durable, easy to control |
Cordless |
Homes with children or pets, shorter-height windows |
Clean look, safer and easy to operate |
Wand Lift |
Users who prefer smooth manual control without cords |
Pull down to lower the shade and smoothly retract the fabric upward with easy wand operation. |
Motorized (Remote) |
Large windows or hard-to-reach areas |
Effortless control, smooth and quiet operation |
Smart Hub |
Smart homes |
App control, scheduling, and automation |
Light Filtering Roller Shades – 60-70% Light Blocking, 4 Fabric Series (AYM, Shantung, Uluru, Arizona), Linen & Textured Weaves, GREENGUARD Certified, Cordless & Motorized, Child-Safe for Living Room & Kitchen
Plain / White - AYM-1

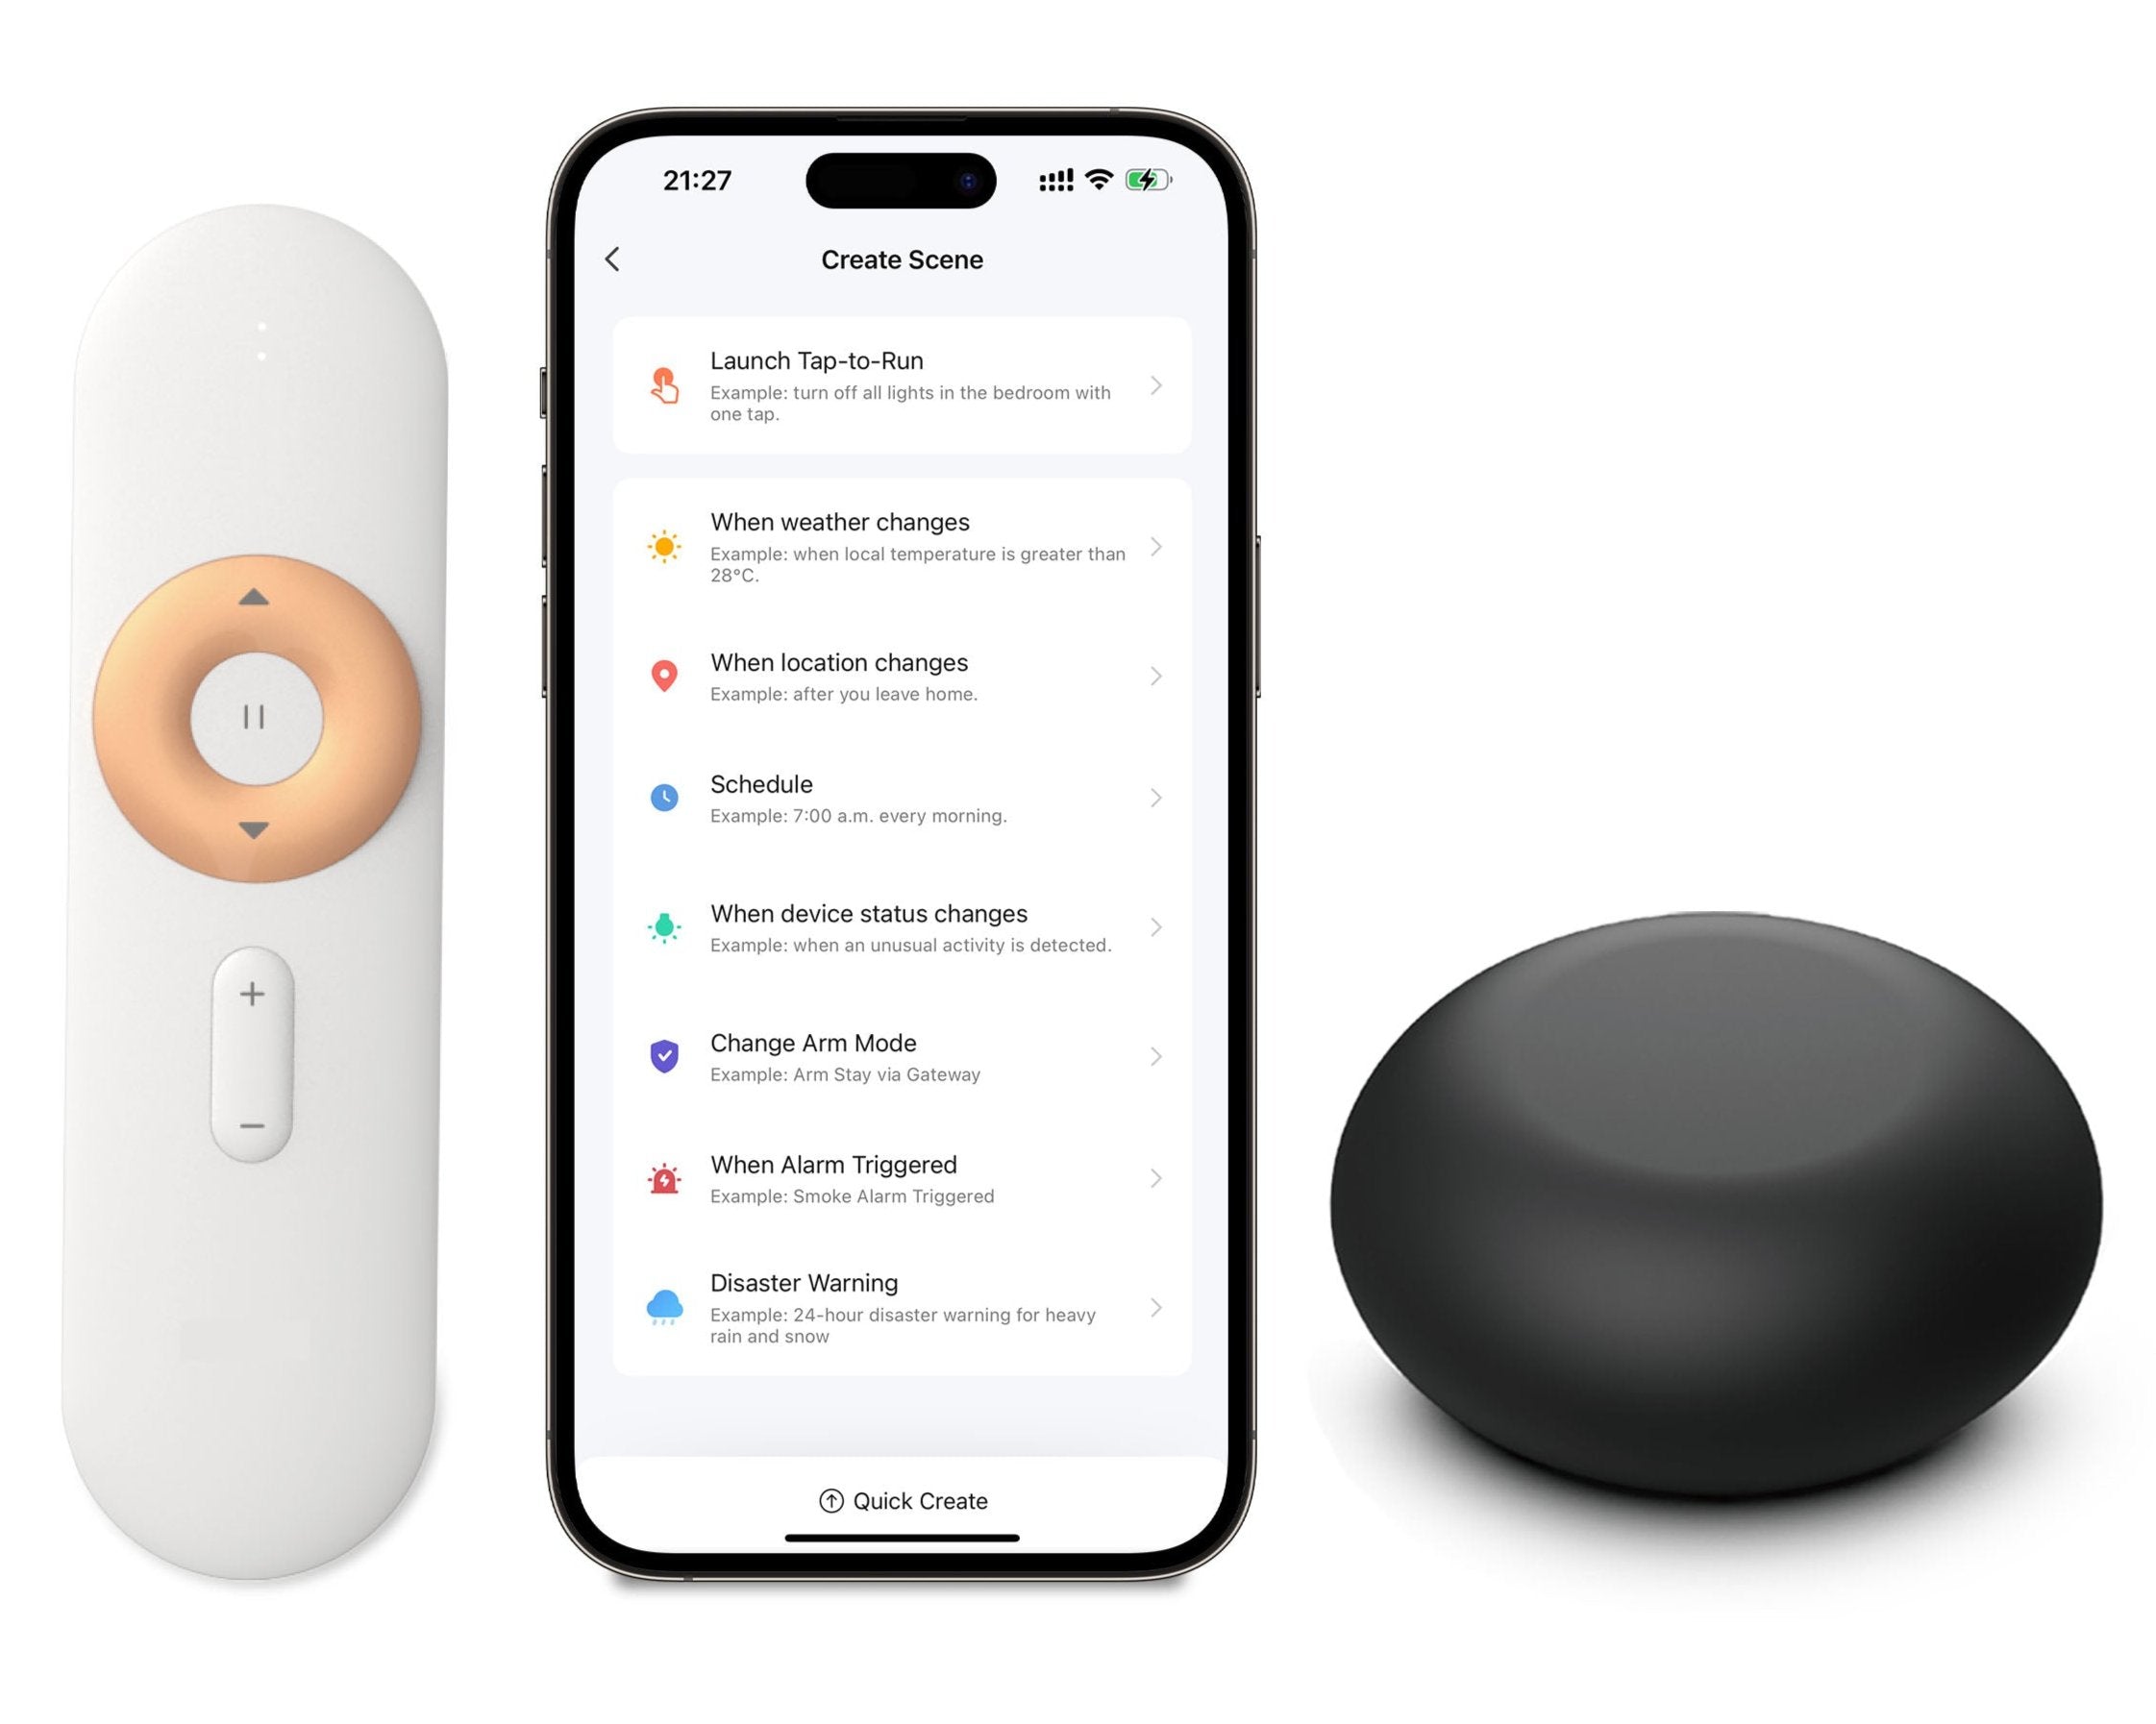
Why Add Motorization?
Our battery motorized shades offers a smooth, quiet, and cordless lifting experience. Equipped with a built-in rechargeable battery, a single 6-hour charge provides up to 6 months of usage. Each unit includes a 3-meter USB charging cable for convenient and flexible recharging.


